


You might be wondering why I’ve specified ‘natural’ jelly here. Well, that’s because the average store bought jelly is rather toxic, packed with petroleum derived chemical colouring, harmful stabilisers, factory farmed animal gelatin and carcinogenic fake sugars. It’s crazy what’s going on, and I’ve profiled the best selling jelly brand and flavour here, to show you what’s really in it!
To make a natural jelly you have 2 options for setting it.
Option 1: Agar agar powder / flakes.
A vegetarian option, seaweed derived and very high fiber. 2 cups of liquid will need 2 teaspoons of powder or 2 tablespoons of flakes, to set the liquid. Dissolve the agar agar into a little water first before heating and then add liquids and heat to a simmer, and then pour into moulds. Agar agar is available here on line in Australia, or extensively through health food shops and whole food stores. If you’re vegan or vegetarian, simply substitute the quantities below, based on the amount of liquid. Agar agar sets more firmly than gelatin. Think Asian jelly dessert texture. Still, lovely things can be achieved, so no one’s missing out!
Option 2: Gelatin powder, often beef derived. Totally flavourless, otherwise that would be a little odd, wouldn’t it?
The one I trust the best is the awesome Great Lakes Gelatin Powder, as it comes from grass fed cows and is 100% single ingredient. Nothing added. This is a protein power house, packed with nourishment from a vast variety of amino acids and awesome to take into your daily smoothie or soup, or even a glass of water, if you have joint aches and pains.
1 level tablespoons sets 2 cups thin liquid to a very wobbly jelly and 2 sets it firm – great for making jelly square bites for example.
1 tablespoons sets a purée consistency like a berry purée or coconut banana purée as below.
What to do for basic jelly?
All you do is heat 1/2 a cup of your purée or liquid to a simmer. Switch off the heat. Whisk in the gelatin quickly into it. Add rest of your liquid. Once well mixed, pour into moulds and refrigerate to set for an hour for small ramekins, up to 3 hours for larger, deeper containers. There you have it. Endless flavour possibilities.
The big secret on jelly / jello making is out – IT’S EASY! If you’re in the US / Canada, click the above link to go through to their site. If you’re in Australia, you can grab some Great Lakes Gelatin here. Don’t panic at the price tag, either. I’ve made 10 batches of jelly so far, used in the odd smoothie on a busy day, and hubby been taking it daily for 2 weeks to get ready for a marathon this weekend – the jar is only half finished! Besides, worry more about the price one pays later for the freaky crystals from the supermarket.
So, while I’ve given you the basic 2 setting ratios and methods for jelly above, I’ve created 3 more, delicious jellies today to inspire you to push the limits on your own creations. So easy. So delicious. So definitely, without a doubt, additive free!
Banana Smoothie Pudding Jelly
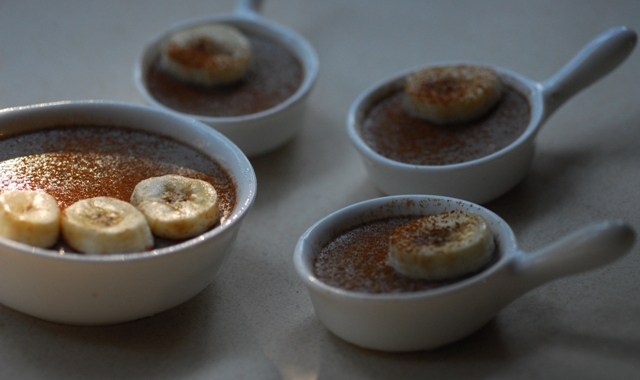
Say no more, right? Show me a baby that wouldn’t devour this pudding-like jelly, packed with nourishment. Show me the kids that wouldn’t down this at breakfast? Show me the ME who couldn’t stop dipping into the stash, to the point of practically having none left to photograph today. Who me?
Banana Smoothie Pudding Jelly
Ingredients
- 180 g bananas (3 small, very ripe ones)
- 1 cup coconut milk
- 1 tbsp Great lakes Gelatin powder
- 1/2 fresh lime (optional. I like a little underlying zing)
- 1/2 tsp vanilla bean powder (also optional if on a budget or you prefer without. Still delicious!)
Instructions
- Put bananas and 1/2 cup coconut milk into a blender with your lime and vanilla powder. Blitz into a creamy smoothness.
- Put the other 1/2 cup coconut milk into a saucepan, medium heat, and as it comes to the boil, switch off the heat. Sprinkle your gelatin over the coconut milk and whisk into it well, until you can’t see any anymore.
- Add the thick banana coconut mix and combine all well. Then pour into little individual bowls, moulds or a simple serving dish for a big family presentation.
- If you have a thermomix, you can do the whole process in the one thermomix bowl.
- Let it set for 2-3 hours. You’re done.
Calming Chamomile and Apple Jelly

Calming Chamomile and Apple Jelly
Ingredients
- 1 cup chamomile tea, brewed with 2 teabags
- 1 cup freshly pressed apple juice (with an optional 1cm chunk of ginger for zing)
- 1/2 tsp sweet spices (cinnamon, cardamom, cloves, all spice, nutmeg type mix. You could just use plain cinnamon though too)
- 1 tbsp honey / maple syrup or rice syrup if you’ve reduced fructose in your diet. There is still fructose in the apple of course.
- 1-2 level tbsp gelatin powder, depending on how firm you want it.
Instructions
- Put 1/2 cup of chamomile on the stove, with the sweetener of choice and sweet spices in a saucepan and bring to the boil.
- Turn off heat. Whisk in gelatin, fast. Add apple juice. Pour into moulds.
- As this jelly is a boring colour (to kids), you could add 15ml liquid chlorophyll to get a more vibrant green colour, or do what I did, and get creative on the garnish top, alternating little wedges of fresh green and red skinned apples.
- Either way, with all that lovely camomile and blood sugar levelling cinnamon, it’s a great companion to the apple’s fructose component and a really refreshing, cleansing jelly. My husband says it would do well with gin, but that’s perhaps not suited to this post so I’ll leave that there.
As this jelly is a boring colour (to kids), you could add 15ml liquid chlorophyll to get a more vibrant green colour, or do what I did, and get creative on the garnish top, alternating little wedges of fresh green and red skinned apples.
Either way, with all that lovely camomile and blood sugar levelling cinnamon, it’s a great companion to the apple’s fructose component and a really refreshing, cleansing jelly. My husband says it would do well with gin, but that’s perhaps not suited to this post so I’ll leave that there.
Pear and Beetroot Jelly
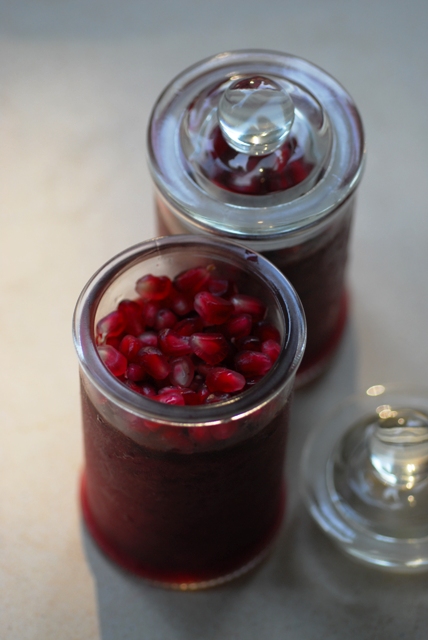
No, there’s no typo. Pear jelly is the most boring colour – it’s kind of brown. Seeing as a few of you might be trying to compete with the petroleum derived, brightly coloured carcinogens for your family’s approval of wholefoods, I reached for the beetroot powder from Herbie’s for this one, to give a gorgeous purply pink colour. You could of course just juice a half beetroot in the mix of making your fresh pear juice, for the same result. Up to you!
Pear and Beetroot Jelly
Ingredients
- 3 large ripe pears (yielding 1 1/2 cups of pear juice. Give or take 50ml will not matter in the slightest)
- 1/2 whole tsp ground cinnamon (depending on how much you love cinnamon)
- 1 tsp beetroot powder
- 1-1 1/2 tsp Great Lakes Gelatin powder, depending on how firm you want it.
Instructions
- Juice your pears. If you don’t have a juicer, buy a small fresh pear juice from your local juice bar and bring home.
- Place 1/2 cup of the pear juice, the cinnamon and the beet powder into the saucepan until almost reaching the boil. Turn off the heat and whisk in your gelatin powder.
- Once all combined well, add the rest of the pear juice, stir through well, and then pop into your preferred serving moulds. I chose little jars for this and topped with fresh pomegranate seeds, because I couldn’t resist the local $1.50 pomegranates at the market. You don’t need to garnish at all if you don’t fancy. Simple is sometimes best.
Please try and use fresh squeezed, unpasteurised juices, or puréed smoothies of fresh fruit and nut milk or coconut. Bottled juices for jelly sadly have little nutrition and a whole lot of fructose, and while it’s still miles better than a fake sweetener in a supermarket jelly, fresh squeezed either yourself, or brought home from a juice bar will be the best treat of all.
Don’t forget to ask any questions or leave comments about your own jelly / jello efforts. Look forward to hearing about your jelly making successes, too!
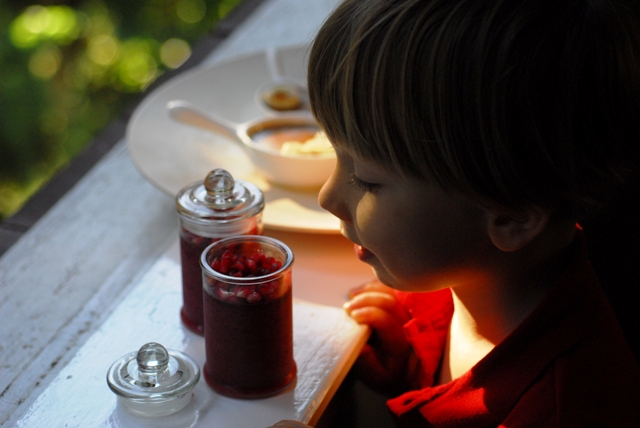
(my little guy wanted to be in one of the pics. Subsequently, this pear and beetroot jelly mysteriously disappeared.)
Real Food. Happy Bodies.


Comments 29
I love this!! Thank you. I have known about agar agar and jelly making but always put it in the too hard basket, this seems both simple and delicious. I know what I will be doing these school holidays, and I am looking forward to it. Your pictures are fabulous, I hope ours look this good.
Author
welcome Bianca. Enjoy! It really is super simple 🙂
Just gorgeous Alexx! It’s amazing how versatile gelatin is – definitely sparks the creativity!
Author
Thanks Kitsa. It really does. I could have kept trialing and testing. Fructose overload made me have to stop. Hehe. Darn stuff!
oh thankyou thankyou I am so going to make these. What about pineapple? would it still set.
Author
If green apple juice does, I can’t see why pineapple wouldn’t Lesley. You could also set pineapple pieces inside a fresh juice jelly. Enjoy!
Author
Hi Lesley,
Just as per friend Cindy’s comment below, pineapple won’t work with gelatin but WILL work with agar agar. SO just use that one if you’re making jelly with pineapple. papaya or kiwi fruit, Alexx
Fab post Alexx – I’m def going to try that pear and beetroot jelly – and love the pick of S – a pure look of adoration on that cute little face of his!
Author
THanks Jos. It is a gorgeous pic isn’t it. The adoration continued as he ate it! 🙂
Some great ideas!!! Need more time 🙁 looks so yummmyyyyy!!!
Author
you’re super welcome. Once you’ve done it once, it’s honestly a 5 minute exercise. Especially if you buy organic fresh squeezed juice and bring home. Enjoy! 🙂
Wow, amazing blog format! How lengthy have you ever been running a blog
for? you make blogging glance easy. The whole glance of your web site is magnificent,
as neatly as the content!
Fabulous recipes. Do you think I could make the banana pudding substituting coconut milk for raw milk? The latter is close to it’s used by date and I’d like to put it to use! Thank you and yum.
Author
Hi Claire,
No probs using raw milk instead. Will be equally delicious, I’m sure. Let me know how you go!
Wow! Seeing this recipe has triggered a primeval response from deep within my former sugar-addicted self. I see jelly and my brain immediately jumps to .. ROCKY ROAD. Could it really be possible to make a healthy version? Nuts yes. Chocolate yes. Now jelly..YES. But marshmallows? Healthy marshmallows? Hmm, think this might be where the fantasy ends…
Wonderful recipes Alexx, as usual.
Author
Thank you Carmel. Yes, it’s totally, definitely true! You go on and get some gelatin and enjoy these treats pronto! 🙂
Love this post. Love the ideas. Love the pics Alexx.
Re pineapple – it won’t set in gelatin because it contains an enzyme that breaks down the protein. (same for papaya and kiwi fruit) But agar agar is fine.
Author
Ah. Awesome. Thanks for those fruits. Do you know what the enzyme is? x
Carmel… rocky road… Great lakes website has a marshmallow recipe…..
Got some of kitsa’s Great Lakes gelatine today. (Super speedy service by the way!) Very excited! Jelly, here we come 🙂
I’ve been surfing online more than 2 hours today, yet I never found any
interesting article like yours. It’s pretty worth enoough for me.
In my opinion, if all website owners and bloggers made
good content aas yoou did, the internet will be much more
useful than eve before.|
I couldn’t refrain from commenting. Perfectly written!|
I will right away clutch your rss feed as I can not to find your e-mail subscription hyperlink or newsletter service.
Do you have any? Please allow me know in order that I may just subscribe.
Thanks.|
It’s the best time to make some plans for the future and it is time to bbe happy.
I have read this post and if I could I want to suggestt you few interesting things or advice.
Maybe you could write next articles referring too this article.
I wish to read even more things about it!|
It iss perfect time tto make a few plas for the loong run and it’s time to be happy.
I have read this post and if I may I desire to suggest you some attention-grabbing issues
or advice. Perhaps you can write next articles referring
to this article. I wish to learn more issues
approximately it!|
I’ve been surfinmg on-line more than 3 hours nowadays, yet I never discovered any fascinating article like yours.
It is beautioful worth sufficient for me.
In myy opinion, if all website owners and bloggers made excellent content material as you probably did,
the internet wijll be much more helpful than ever before.|
Ahaa, its fastidious conversatikn regarding this article here
at this web site, I have read all that, so now me also commenting here.|
I am sufe this paragraph has touched all the internet viewers, its really realloy niice
post on building up nnew weblog.|
Wow, this article is good,my younger sister is analyzing such things, therefore I am going
to convey her.|
bookmarked!!, I really like your website!|
Way cool! Soome extremely valid points! I appreciate you penning this write-up aand also the rest of the website is very good.|
Hi, I do think this is a great site. I stumbledupon it 😉 I may revisit once again since i have saved as a favorite it.
Money and freedom iss the best way tto change, may you be rich and contijue to guyide others.|
Woah!I’m really enjoying the template/theme of this blog.
It’s simple, yet effective. A lot of times it’s
tough to get that “perfect balance” between superb usability and appearance.
I must say you have done a awesome job with this. Additionally,
the blog loads super quick for me on Safari. Superb Blog!|
These are actually enormous ideas in regarding blogging.
You have touched some good points here. Any way keep
up wrinting.|
I really like what you guys are up too. Such clever work and exposure!
Keep up the fantastic works guys I’ve you guys to my
blogroll.|
Hi! Someone in my Myspace group shared this site with us
so I came to look it over. I’m definitely loving
the information. I’m bookmarking and will be tweeting this to my
followers! Outstanding blog and brilliant design and style.|
I really like what you guys are up too. This kind of clever work and exposure!
Keep up the great works guys I’ve incorporated you guys to my blogroll.|
Hey there would you mind sharing which blog platform you’re using?
I’m going to start my own blog in the near future but I’m having a hard time
selecting between BlogEngine/Wordpress/B2evolutionand Drupal.
The reason I ask is because your layout seems different then most blogs and I’m
looking for something unique. P.S Apologies for being off-topic but I had to ask!|
Hi would you mind letting me know which web host you’re utilizing?
I’ve loaded your blog in 3 completely different browsers and I must say
this blog loads a lot faster then most. Can you suggest a good hosting provider at
a honest price? Thank you, I appreciate it!|
Everyone loves it when folks come together and share ideas.
Great website, stick with it!|
Thank you for the good writeup. It in fact was a amusement account it.
Look advanced to more added agreeable from you!
However, how can we communicate?|
Hey there just wanted to give you a quick heads up. The text in your article seem to be running off the screen in Ie.
I’m not sure if tuis is a format issue or something to do with internet browser compatibility bbut I thought I’d post to let you know.
The design look great though! Hope you get the problem resolved soon.
Cheers|
This is a topic which is close to my heart… Best wishes!
Exactly where are your contact details though?|
It’s very effortless to find out any matter on net as compared to textbooks,
as I found this paragraph at this website.|
Doess your blog have a contact page? I’m having
problems locating it but, I’d like to senjd you an email.
I’ve got some ideas for your blog you might be interested in hearing.
Either way, great blog and I look forward to seeing it expand over time.|
Hola! I’ve been reading your blog for a while now and finally gott the courage to go
ahead and give you a shoutt out from Austin Texas! Just wanted to say keep uup the good work!|
Greetiungs from California! I’m bored to tears at work so I
decided to check out your website on my iphone during lunch break.
I really like the knowledge you provide here and can’t wait to take a look when I get home.
I’m amazed at how fast your blog loaded on my mobile .. I’m
not even using WIFI, just 3G .. Anyhow, great site!|
Its such as you learn my thoughts! You appear to understand a lot approximately this, such aas you wrote the guide in it or something.
I think that you can do wjth some percent to pressure the
message house a little bit, however otther thasn that, that iss excellent blog.
A great read. I will definiotely be back.|
I visited various logs but the audio quality for audio songs
existing at this site is genuinely fabulous.|
Hi, i read your blog from time to time and i own a
similar one and i was juset curious if yyou get a lot of
spam comments? If so how doo you reeduce it, any plugin or anything you can suggest?
I get so much lately it’s driving me mad so
any support is very much appreciated.|
Greetings! Very helpful advice within this post!
It’s the little changes which wilol make the
largest changes. Many thanks for sharing!|
Itruly love your site.. Very nicee colors & theme.
Did you build this web site yourself? Please reply back as I’m
looking to create my own personal site and want to find
out where you got this from or what the theme is named.
Appreciate it!|
Howdy! This article couldn’t be written much better!
Going through this post reminds mme of my prrevious roommate!
He always kept preaching about this. I aam going to send this information to him.
Fairly certain he’s going to have a good read. Many
thanks for sharing!|
Incredible! This blog looks just like my old one!
It’s on a totally different topic but it has pretty much the
same page layout and design. Ouystanding choice of colors!|
There is definately a great deal to know about this
topic. I really like alll of the points you’ve made.|
You have made some decent points there. I checked on the internet for
additional information about the issue and found most people will go along with your views
on this site.|
Hi there, I read your new stuff daily. Your writing style is witty, keep
doing what you’re doing!|
I simply couldn’t depart your web site prior to suggesting that
I actually loved the standard information an individual provide to your guests?
Is gonna be again regularly to check out new posts|
I needed to thank you for this great read!! I certainly enjoyed every little
bit of it. I’ve gott youu saved ass a favorite to look at nnew things you post…|
Hi, jut wanted to say, I liked this post.
It was helpful. Keep on posting!|
I comment whenever I appreciate a post on a blog orr I have
something to contribute to the discussion. It’s a result of the sincerness communicated in the
article I browsed. And on this post You say Jello I say Jelly.
Either way, here are 3 delicious, natural Jelly recipes..
I was actually moved enough to drop a thought 🙂 I do have a
couple of questions for you if you usually
do not mind. Could it be just me or do a few of the responses come across as
if they are coming from brain dead folks? 😛 And, if you are writing at additional places, I’d like to keep up with you.
Could you list all of all your public sites like your linkedin profile, Facebook pae
or twitter feed?|
Hello, I enjoy reading all of your article. I like to write
a littlpe comment to support you.|
I always spent my half an hour to read this web site’s content all the time along with a mug of coffee.|
I always emailed this blog post page to all my friends, since if like to read it then
my links will too.|
My developer is trying to persuade me to
move to .net from PHP. I have always disliked the idea because
of the costs. But he’s tryiong none the less. I’ve been using WordPress on various websites for about a year and am worried about switching to another platform.
I have heard great things about blogengine.net. Is there a
way I can transfer all my wordpress posts into it?
Any help would be greatly appreciated!|
Hello! I could have sworn I’ve been to this web site before but after going through
a few oof the articles I realuzed it’s new to me. Anyhow, I’m definitely pleased I found it and I’ll
be book-marking it and checking back regularly!|
Great article! That is the type of information that are supposed to be shared around the internet.
Shame on Google for no longer positioning this post upper!
Come on over and seek advice from my web site .
Thank you =)|
Heya i am for the first time here. I came across this board and I find
It truly useful & it helped me out a lot. I hope to give
something back and help others like you helped me.|
Hello there, I believe your site could be having browser compatibility
problems. Whenever I take a look at your blog in Safari, it
looks fine however, when opening in Internet Explorer, it has some overlapping
issues. I simply wanted to provide you with a
quick heads up! Besides that, great site!|
Somebody necessarily lend a hand to make seriously articles
I might state. That is the very first time I frequented your website page and up to now?
I amazed with the research you made to make this particular publish extraordinary.
Wonderful process!|
Heya i’m for the primary time here. I found this board andd I find It truly
useful & it helped me out a lot. I’m hoping
to present one thing again and aid others like you aided
me.|
Good day! I simply want to offer you a huge thumbs up for the excellent info you have right
here on this post. I am coming back to your site for more soon.|
I all the time used to study article in news papers but now as I am a user of
net thus from now I am using net for articles or reviews, thanks
to web.|
Your way of telling the whole thing in this piece of
writing is genuinely pleasant, all be able to effortlessly be aware of it,
Thanks a lot.|
Hello there, I discovered your site by way of Google while searching
for a comparable subject, your website got here up, it
seems to be good. I have bookmarked it in my google bookmarks.
Hello there, simply changed into alert to your blog through Google, and found that
it is really informative. I am going to be careful for brussels.
I will be grateful when you proceed this in future. Lots of people can be benefited
out of your writing. Cheers!|
I’m curious to find out what blog system you’re using? I’m experiencing some minor security issxues
with my latest website and I’d like to find something more safeguarded.
Do you have any recommendations?|
I’m extremely impressed with your writing skills as well as with the layout on your
blog. Is this a paid theme or did you customize it yourself?
Either way keep up the nice quality writing, it’s rare to see a great blog like this one nowadays.|
I’m really inspired with yourr writing talents as smartoy as with the structure
on your blog. Is that this a paid theme or did you customize itt yourself?
Anyway kewp up the excellent high quality writing, it is rare to see a nice blog
like this one nowadays..|
Hi, Neat post. There is an issue alog with your web site in web
explorer, migvht check this? IE nonetheless is the marketplace chief and
a goodd portion of othger people will leave out your fantastic wrditing
due to this problem.|
I am not sure where you’re getting your info,
but good topic. I needs to spend some time learning more
or understanding more. Thanks for great info I was looking for this info for my mission.|
Hello, i think that i saw you visited my site
so i came to “return the favor”.I’m attempting to find
things to enhance myy website!I suppose itss ook to use some of
your ideas!!
\
Great ideas Alex!
Just wondering could you use watermelon juice?
Just thinking simpler for very fussy junk food addicts!!
Author
you sure can! Any juice except pineapple and kiwi work 🙂
Entre los problemas comunes que nos hemos encontrado en Parla podemos garantizar la solución inmediata de los siguientes: Apagones, sobrecarga de la red, reparación de enchufes e interruptores, existe un enchufe sin corriente, salta el interruptor diferencial, la tarifa nocturna no carga, salta frecuentemente el limitador de potencia, diferenciales y cualquier derivación, parte de la vivienda local sin luz.
Además, disponen de una gran selección de equipos de aire acondicionado y climatización, ofreciendo al cliente calidad y garantía de las mejores marcas y fabricantes. Solicite presupuesto sin compromiso para la instalación de bombas de calor, aire acondicionado, sistema contra-incendios, ventilación industrial, rejillas de ventilación, maquinaria de hostelería y frío industrial para su empresa.
Hello there it’s me, I am additionally visiting this site routinely, this site is great and individuals are truly sharing lovely considerations.
Any hints for making gummies that require 80g of jelly crystals?
Goo one. Really impressive and helpful content. I really liked this and definitely will share it with my friends.
Author
Oh, thank you so much x